Relief from Calf or Achilles Pain: Your Essential 3-Step Guide
Written on
Recognizing and Addressing Calf or Achilles Pain
Whether you’re an avid soccer player or a dedicated marathon runner, calf or Achilles pain is a common hurdle in endurance sports. If you haven’t yet encountered it, consider yourself fortunate. For those grappling with rehabilitation and pain management, I’d like to share some effective strategies that have helped me recover from significant injuries.
I firmly believe that there are three crucial tactics that can fast-track your rehabilitation. These techniques are simple to integrate into your routine and will not only help you regain your strength but also maintain it. While it may require short-term sacrifices, the effort and discipline will yield long-lasting benefits.
Let’s embark on a healing journey to regain your active lifestyle!
Step-by-Step Guide to Getting Back on Your Feet
Before we delve into exercises and recommendations, it's vital to acknowledge that introducing new movements and altering your routine can pose risks. If you have existing injuries or chronic issues that could complicate physical activity, consult with a trusted healthcare professional before implementing the following suggestions.
Generally, these exercises should be challenging yet manageable, ideally remaining at a 3 out of 10 on the pain scale. Should you experience any discomfort, pause that exercise and revisit it later. For optimal results, aim to perform these exercises 3 to 4 times a week! If you need personalized modifications, feel free to ask in the comments below, and I’ll respond promptly. Now, let’s get to the exciting part!
Step 1: Pause Your Activity
Surprisingly, stopping what you’re doing is often the hardest part for many individuals. When you first notice a twinge or pain, it’s wise to cut your activity short. While adrenaline may tempt you to continue, pushing through typically worsens the situation. In my extensive experience as a kinesiologist, I’ve yet to encounter a client who benefited from ignoring calf or Achilles pain.
So here’s my challenge: Pay attention to your body. When something feels off, set aside your pride and take a break. Although it may seem difficult at the moment, your patience and self-discipline will lead to a quicker return to activity.
Step 2: Focus on Ankle Mobility
Once you’ve paused any activities that exacerbate your symptoms, it’s time to focus on rehabilitation. This area of the body responds exceptionally well to mobility and light strengthening exercises. Begin by enhancing your dorsiflexion (bending the toes towards the shin), which helps stretch the calf muscles and Achilles tendon. Here are two effective methods to achieve this:
Kneeling Soleus Stretch
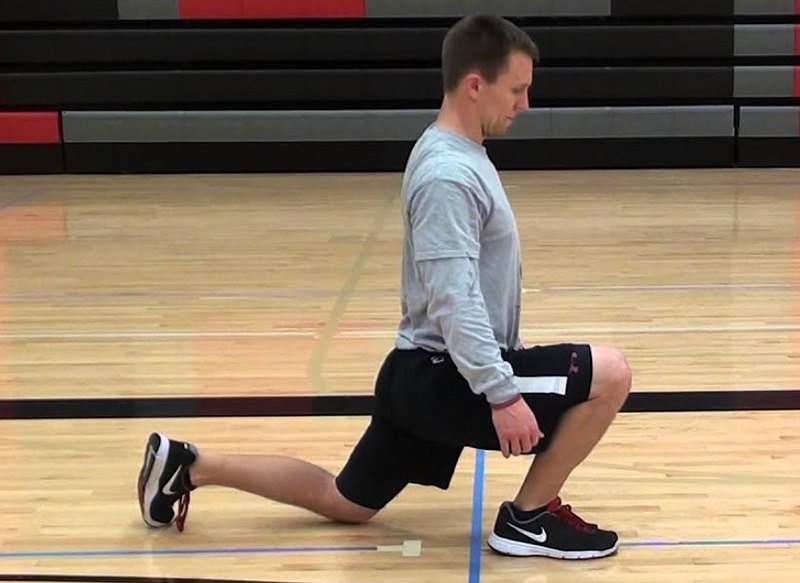
Application: 5–8 times for 5 seconds per side
Instructions: Start in a passive lunge position with your knee aligned over the front toes. Lean forward into the stretch while allowing your heel to lift slightly off the ground. Use your hands for stability if needed. Hold the stretch for about 5 seconds at your deepest pain-free position, then return to neutral. If you don’t feel a good stretch in the front calf, move your back knee closer.
Anterior Step Down
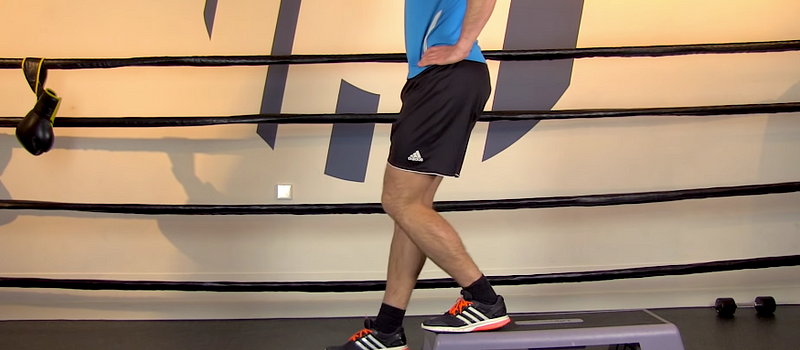
Application: 10–12 reps per side
Instructions: Stand on a raised surface or curb. Keep one foot (including the heel) firmly planted while bending the knee of the other leg, allowing it to lower towards the ground. Lightly tap the bottom foot on the floor, then push back up using the glutes and quads of the planted leg. Focus on keeping the heel of the back leg down to enhance ankle mobility and stability. If this proves too challenging initially, use a wall for balance support.
Step 3: Embrace Calf Raises
Calf raises are among the most accessible and effective exercises for healing calf and Achilles issues, as they gradually strengthen these tissues under load. The following movements require minimal equipment and can be performed almost anywhere. Just remember to complete your mobility exercises first to warm up!
Ball Squeeze Calf Raise
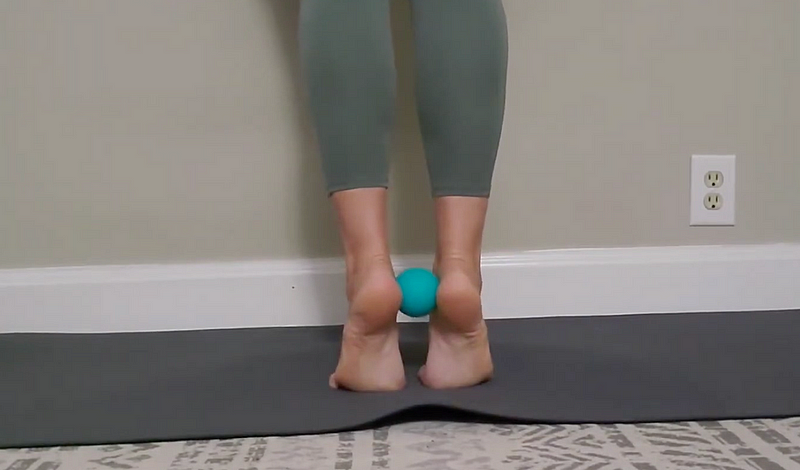
Application: 12–15 reps
Instructions: Place a ball between your heels and perform regular calf raises. Hold for 2–3 seconds at the top of each rep while maintaining pressure between your heels. This slight adjustment engages your tibialis posterior, improving fascia health and the relationship between your leg and foot.
Single-Leg Bent-Knee Calf Raise
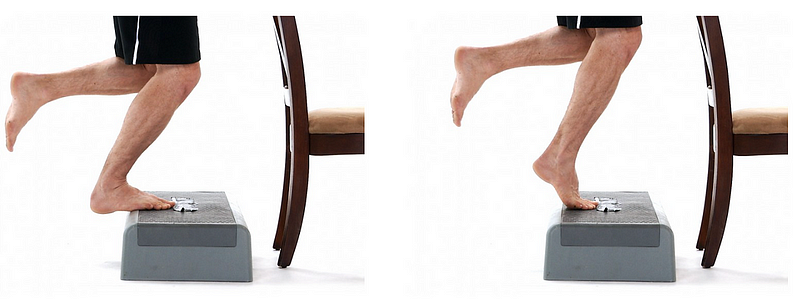
Application: 12–15 reps per side
Instructions: Stand on a platform with a chair or other support in front of you. Start with a slight bend in your knees. Lift one foot off the ground and rise onto the other foot in a single-leg calf raise. Hold at the peak of your pain-free motion for 2–3 seconds, then lower slowly. If this is too difficult, place more weight on your support or start with both legs.
Quick Rebound Calf Raises (single-leg)
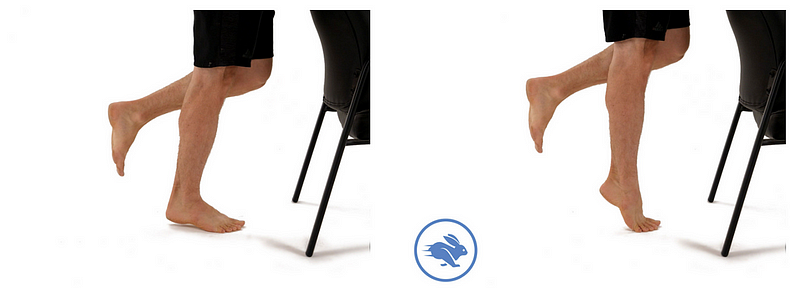
Application: 12–15 reps per side
Instructions: Use a balance support and lift yourself onto one foot. Execute quick calf raises while ensuring you reach your maximum range of motion with each rep. Remember, "quick" does not mean uncontrolled. If you’re not ready for the single-leg variation, start with standard calf raises. This exercise simulates the stresses you’ll encounter when returning to your preferred activities.
For more exercises, explore my full rehabilitation routines here. There’s something tailored for everyone!
In Conclusion
If you’re dealing with foot pain or Achilles-related issues, this concise exercise program could be the solution you need. These areas are often overlooked by athletes, yet this training approach is one of the easiest ways to maintain health and enhance athletic performance. Whether you’re a dedicated runner or spend long hours on your feet, the routine outlined above can be transformative. Here’s to a pain-free life and maximizing your daily potential!
-DavidLiira.Kin